








We already liked the Lelit Elizabeth in our first test. Now Lelit has followed up: the Elizabeth 3 is a dual boiler for 1,650 euros that controls pressure and flow in two different ways. With the Pagaia, the small wooden lever on the side, you can regulate the flow by hand during the shot. On top of that, each of the two buttons stores a pressure profile with up to five stages. That makes shots repeatable, and nothing in this price range could do that until now.
We measured the Elizabeth 3 according to our test protocol 2.3.2 and sent the old Elizabeth through the same protocol again at the same time. That way you can compare both machines directly. The central question: what does the new control system bring to the cup, and what does the smaller brew boiler cost you?
We did not buy this machine. We received it before the official market launch so we could test it in time, and at that point Lelit was not yet able to invoice us. That changes nothing about how we test: as always, independently and conscientiously.
Because we want to pay for every test machine to protect our neutrality, we are donating the purchase price of 1,650 euros to the Instituto “Fazenda da Cachoeira” in Brazil. It does cultural and educational work in regenerative agriculture, transfers knowledge in cooperation with universities and runs projects on integration and empowerment.
We have already tested the old Elizabeth in detail. You can find our test of the Lelit Elizabeth with the new measurements here, and we explain how the lever works on the Victoria and Mara in our article on Lelit Pagaia.
What’s new: pressure profiles, Pagaia and a smaller brew boiler
At first glance the Elizabeth 3 looks like the old one. It still weighs 15 kilos and, at 38 centimetres wide, 38 centimetres high and 36 centimetres deep, is almost a cube. Inside, however, quite a lot has changed. The brew boiler has shrunk to 0.2 litres, the steam boiler stays at 0.6 litres, and the water tank holds 2.5 litres.
The real innovation is the pump control. Lelit regulates the vibration pump via pulse-width modulation, in other words via how much power goes to the pump. At the same time, a pressure sensor measures how much resistance the coffee puck puts up against the pump. The technology is based on patents from Sage, whose group Lelit now belongs to. You can see the result on the display: during the shot, the machine shows the pressure on the coffee and the selected profile.

Build quality: wood instead of plastic, and very quiet at 56 decibels
In our first test of the old Elizabeth, we criticised the steam knob as cheap and unattractive, and many of you then built your own knobs from wood or on a 3D printer. That is now sorted. Steam knob, portafilter handle, tamper and Pagaia are made of the same wood, and everything feels much higher quality. The water tank lid now also sits in a small guide. As usual, Lelit also uses rubber buffers, so less rattles.
You notice it when brewing, too. At 56 decibels the Elizabeth 3 is very quiet, and especially with a pressure profile the pump purrs rather than hums. In our rating that earns an 8.
It’s not without compromises. The stainless steel sheet is relatively thin and has a slightly sharp edge in one place, and you can see every fingerprint on the brushed steel. That’s why Michel would go for the black version: the lacquer looks higher quality and shows fewer marks. Black and white cost 50 euros more. Overall, we rate build quality at 8.
Pressure profiles: five stages per button
Each of the two shot buttons can store its own profile with up to five stages. For each stage you set the pressure in half-bar steps and the duration. You don’t need a complicated app for this; programming is done via the familiar Lelit display.
You don’t have to use all five stages. If you set the second stage to 30 seconds, stages three to five never come into play, because no shot lasts that long. For everyday use, a gentle wetting of the puck followed by brewing at 8.5, 9 or 7.5 bar is often enough. If you like, you can use all five stages to store a lever profile that rises to 9 bar and then drops by one bar every few seconds.
The display is the same one Lelit has been using for years. It takes a little dexterity, but once you know the logic you find your way around quickly. Michel found saving the profiles intuitive. There are also settings for steam temperature, the steam boiler can be switched off, and the lighting can be adjusted.

Pagaia: regulating flow by hand during the shot
Do you still need the lever when the machine stores profiles? Yes and no. With the Pagaia you start the shot directly on the side and then react to what you see and to the pressure the display shows. That’s handy if you simply want to try a roaster’s recipe without saving it straight away, or if you just want to control things freely by hand.
The lever is even more useful when a shot gets out of hand. In our test, one shot ran too fast towards the end, even though we had already set the grind finer. With the Pagaia we slowed the flow and ended up at 22 to 23 seconds. At 9 bar the coffee would probably have rushed through after 19 seconds. More expensive machines with flow control such as the Maro do this automatically and call it smart profiling. Here you do it yourself. There is one limitation: you have to start the shot with the lever. If you start with the button, you can’t switch to the lever in the middle of the shot.
Whether you really need both, we didn’t entirely agree on in the team. For one of us, the electronic control alone would have been enough if the machine were 200 euros cheaper. The other values the lever precisely as a tool for rescuing individual shots. However, the lever can’t be combined with an electronically stored profile.
Espresso: Robusta with a profile, 18.5 grams in the basket
For the first espresso, Michel deliberately chose something unexpected: a pure washed Robusta from India called Bharath. 18.5 grams in the double basket. He brewed with a profile: eight seconds at 3 bar so the puck is fully wetted, then 8.5 bar for the remaining 17 seconds, with 45 grams in the cup.
In the cup it is very strong, with a peaty, dark note reminiscent of rye bread. The baskets are the usual stamped baskets, solid but nothing special. If you want to upgrade, take a cylindrical basket that goes straight down, like our KM Pro baskets.

Brewed in our test: Bharath, espresso from India
Washed Robusta from Bharath Belliappa, with warm cocoa, marble cake and a creamy texture.
Technically, the Elizabeth 3 has a lot of potential. We rate the profile control at 2.5 out of 3.5 points and the hardware at 1.5 out of 2. You can brew a strong Robusta with it just as well as a very lightly roasted competition coffee. Temperature is what holds it back, more on that in a moment. Overall, espresso potential scores 6.5 across all shots. If you know how to handle the Elizabeth 3, you can still get everything out of each individual shot. For that you should know how the temperature behaves on the second and third shot.
How to set grind size and brew ratio in principle is explained in our guide to making espresso.
Temperature: 93.6 °C on the first shot, then 2 degrees less
In terms of temperature, the Elizabeth 3 has taken a step back compared with its predecessor, probably partly because of the smaller brew boiler. You can brew very precisely with it. It only becomes a problem when you pull many shots in a row and don’t know how the machine behaves. That’s why we spent a lot of time with the new Elizabeth to examine its behaviour closely for you.
We measure with the Scace directly in the portafilter, always at a set temperature of 94 °C. In the KM protocol we pull five double espressos one minute apart. The first shot after 20 minutes comes in at 93.6 °C, just 0.4 degrees below the setting. From the third shot onwards, the Elizabeth 3 settles at 91.6 to 91.8 °C and drops no further.
Our rating is based on the protocol with one minute between shots. If you give the machine two minutes between shots, it becomes much more consistent: all five espressos then fall within 0.9 degrees, between 91.4 and 92.3 °C. That’s easy to do at home. Serve the espresso, prepare the next one, and especially with single dosing two minutes pass quickly.
With one or two espressos you are in a good range anyway. When guests come and you pull more shots in a row, give the machine two minutes between shots. Then the temperature stays stable from cup to cup.
| KM protocol | Shot 1 | Shot 2 | Shot 3 | Shot 4 | Shot 5 | Range |
|---|---|---|---|---|---|---|
| Old Elizabeth, 20 min, 1 min break | 84.82 | 84.40 | 87.26 | 89.79 | 93.42 | 9.02 |
| Old Elizabeth, 25 min, 1 min break | 90.71 | 92.52 | 93.60 | 94.01 | 93.64 | 3.30 |
| Elizabeth 3, 20 min, 1 min break | 93.60 | 92.38 | 91.79 | 91.64 | 91.75 | 1.96 |
| Elizabeth 3, 20 min, 2 min break | 92.27 | 92.10 | 92.10 | 91.44 | 91.35 | 0.92 |
All values in °C, average per shot over seconds 5 to 25, set to 94 °C. The series with a two-minute break deviates from the standard protocol and shows our recommendation for everyday use.
The step back becomes clearer in the WBC protocol, i.e. 14 shots at short intervals with milk steamed in parallel. Here the Elizabeth 3 starts at just under 95 °C and ends just under 90 °C. The temperature window is 5.5 degrees. In this test, the old Elizabeth keeps the first eleven shots between 92.8 and 94.6 °C and only drops at the end. So the Elizabeth 3 is not built for catering with many shots in a row.
In the temperature rating, the first shot, which hits almost spot on, earns full points. Points are deducted for the drop over five shots, for the slightly rising curve within the shot and for the WBC test. Together that makes 5.9.
Heat-up time: 20 minutes to stable temperature
The Elizabeth 3 is somewhat faster than its predecessor, but not really fast. After our retest we assume 25 minutes for the old Elizabeth and 20 minutes for the new one. Only then do the shots deliver the temperature described above. We also measured after 15 minutes: at a setting of 93 °C, the five shots were only between 88.4 and 89.2 °C. That’s consistent, but about four degrees too cold.
In other tests you read about nine minutes, and that’s also what Lelit states. Lance Hedrick checked this in his video with one shot and got 89.6 °C at a setting of 90 °C. We don’t dispute that at all. The machine heats at full power for a good eight minutes, and a single shot can certainly be right after that. But our protocol asks for a series of shots, and after 15 minutes that series is still clearly too cool.
We ran a series after 15 minutes at a setting of 93 °C, and the temperature averaged 88.66 °C. Had Lance set his machine above 90 °C, he would probably have seen that it doesn’t reach temperature after 10 or even 15 minutes.
The Elizabeth 3 needs 20 minutes to be properly warmed through for several shots in a row. Incidentally, our power measurement explains quite well why the machine quickly reaches 88 to 90 °C but not 93 °C: after about eight minutes it stops heating at full power. Lelit has left some heat-up speed on the table there.
If you’re looking for a machine that is ready after a few minutes, the Elizabeth 3 is probably not the right match. Thick-film heaters and thermoblocks are much faster. That’s why the Elizabeth 3 gets a 4 for heat-up time. But once it is up to temperature, the temperature stays reasonably stable, especially if you follow our temperature tip.
Milk foam: 300 ml to 60 °C in 30 seconds
Surprisingly much has changed in steaming, even though the steam boiler is the same size. The Elizabeth 3 steams faster and with more pressure than the old one. It brings 300 millilitres of milk from 8 to 60 °C in 30 seconds. That’s quick, but not so fast that it becomes difficult. You only need to tilt the jug slightly to get a good whirlpool. Before steaming, about 4 millilitres of condensation come out of the wand, which is insulated and doesn’t feel very hot.
But it isn’t a catering machine here either. After the third or fourth steaming in a row, the power drops noticeably. We don’t count that against it, because the machine is designed for home use. Steaming quality gets a 7.8. You’ll find the right milk jug for latte art in our shop.
Volumetrics: time control instead of a flow meter
The two buttons work with a time control, not a flow meter. You could argue that a flow meter would have been nice. But a flow meter that delivers precisely even with changing pressure profiles doesn’t exist for 1,650 euros; that quickly costs considerably more. Even more expensive machines that are supposed to do this often fail at it.
If you work consistently and have set up the machine properly, the time control dispenses water reliably. It still isn’t volumetrics in the strict sense. Our recommendation: control with an espresso scale. In the rating, pure time control gets a 3.
Power consumption: 0.075 kWh in espresso mode
We explain how we measure in our power measurement. For dual boilers, the rating is based on the economical espresso mode, i.e. heating up and one espresso with the steam boiler switched off. Here the Elizabeth 3 comes to 0.075 kWh, which is a very good value for a dual boiler. With the steam boiler on, it’s 0.154 kWh for an espresso and 0.172 kWh for a cappuccino, so a good twice as much.
The curve shows where the power goes. With the steam boiler on, the machine heats at full power of around 990 watts for a good eight minutes, using 0.126 kWh. After that, the PID only holds the temperature with short pulses, and the remaining twelve minutes until the first shot cost 0.019 kWh. Without the steam boiler, the full-power phase is over after just 2 minutes and 20 seconds, and after 20 minutes the meter reads 0.068 kWh, less than half.
Because both boilers are small, consumption stays moderate for a dual boiler, even though heat-up is long. The second ten minutes of heat-up needed for stable temperatures cost just 0.016 kWh with the steam boiler on. When brewing, the heater tops up briefly after each shot; an espresso accounts for 0.007 kWh without and 0.009 kWh with the steam boiler. If you drink a coffee in the morning, at noon and in the evening, it’s better to switch the machine on 20 minutes beforehand each time rather than keeping it warm all day. Keeping it warm costs 0.084 kWh per hour with the steam boiler and 0.045 kWh without. In the rating that gives an 8.
If you only drink espresso, switch off the steam boiler. Heating up and the first espresso then need only half as much power. A note from our measurements: in our temperature run without the steam boiler, shots came in around 90 °C at a setting of 94 °C, about 2 degrees lower than with the steam boiler.
Accessories and operation
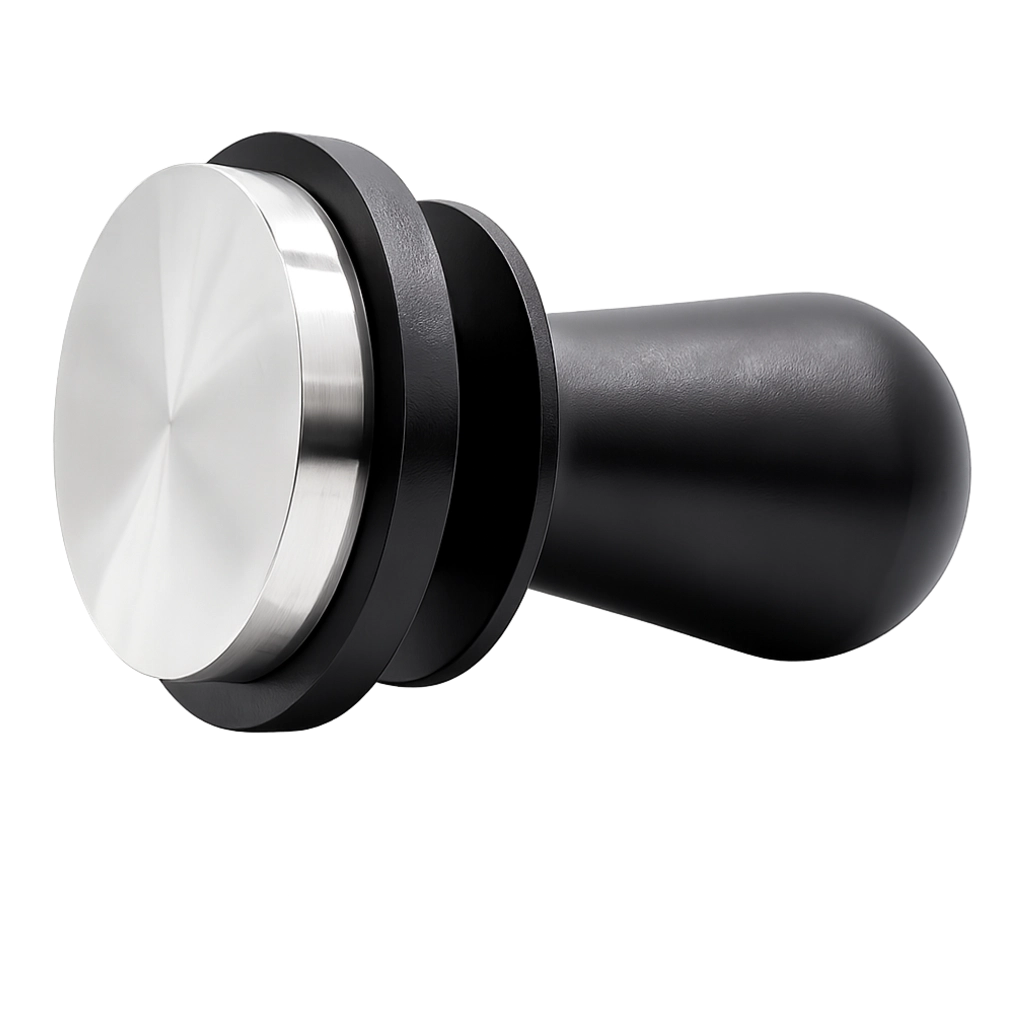
Lelit’s tamper has always been good, and that hasn’t changed. At 58.55 millimetres it sits flush with the basket, without any noticeable gap. There’s also a cleaning set, a blind basket, baskets in different sizes and optional taller wooden feet. As usual with Lelit, only a portafilter with a double spout is included. The spouts are so close together that they fit into most espresso cups. By the way, we really like this Lelit portafilter, because the espresso flows out so nicely at the front, like a hazelnut-creamy stream into the cup, which looks almost as beautiful as with a bottomless portafilter. We rate the accessories at 8.
As always, a water filter is included. It removes total hardness but leaves alkalinity in place, which somewhat neutralises the taste. We don’t recommend this type of filtration for coffee. You are still protected against limescale with it.
In everyday use the 1,200-millilitre drip tray helps, and the water tank is easy to remove. The water level, on the other hand, is hard to see. The manual explains the programming solidly and to the point, but doesn’t go into depth. As one of the first machines, ours came with an English manual. Lelit is generally not very transparent in its manuals, even though the machines can often be adjusted more widely than described there. We rate usability at 7.

Elizabeth 3 or the old Elizabeth?
The new Elizabeth has become a different machine. It reaches stable temperature faster, steams more powerfully, is quieter and can store pressure profiles. In return, it loses more temperature than the old one over many shots in a row. If you mainly drink one or two espressos a day and enjoy profiles, the Elizabeth 3 is the better choice. If you regularly pull many espressos in a row, take a look at our dual boiler tests with larger brew boilers.
KM rating
0 – 100
With 61.7 out of 100 points, the Elizabeth 3 lands in the “good / standard” class. That sounds more sober than our impression of the machine in the test, and there is a reason: our protocol rates the entire package. Weak individual scores for volumetrics, heat-up time and catering pull the average down, while the pressure profiles only feed into part of the espresso potential. That’s also why the calculated value-for-money score of 5.1 lands just above the market average.
Conclusion: pressure profiles for 1,650 euros
Would we recommend the Elizabeth 3 to our best friend who wants to invest 1,650 euros in an espresso machine? Michel answered without hesitation: “Good heavens, yes!” That’s still a lot of money. But a dual boiler with electronically controlled, storable pressure profiles hasn’t existed in this price range until now. So far, you could only get that by retrofitting flow control to a machine yourself, or by buying much more expensive machines such as the Sanremo You.
The weaknesses are clear: 20 minutes of heat-up time, time control instead of real volumetrics and a small brew boiler that loses temperature over many shots in a row. Add to that the thin sheet metal that shows every fingerprint. If you leave two minutes between shots at home, you get stable temperatures with a deviation from the setting that is unusually small for Lelit.
The Elizabeth 3 makes good espresso, steams well and lets you play with pressure profiles if you want. But you can just as easily brew at 9 bar, and the coffee tastes good then too. Which type of machine suits you in principle is summarised in our espresso machine buying guide.
No time for the full video? We’ve summarised the key findings in ten minutes:
You can get the Lelit Elizabeth 3, for example, from Stoll Espresso*, our recommended Lelit service workshop.
* Affiliate link: if you buy via this link, we receive a small commission. The price stays the same for you.
Technical data at a glance
| Feature | Lelit Elizabeth 3 |
|---|---|
| Price | approx. 1,650 euros (stainless steel), approx. 1,700 euros (black, white), RRP, as of October 2026 |
| Type | Dual boiler with PID |
| Boilers | Brew boiler 0.2 l, steam boiler 0.6 l |
| Pump | Vibration pump with pulse-width modulation and pressure sensor |
| Profiling | 2 buttons with 5 pressure stages each, Pagaia lever for manual flow control |
| Volumetrics | Time control |
| Heat-up time | 20 minutes (measured) |
| Brew temperature | 93.6 °C on the first shot, 91.6–91.8 °C from shot 3 (set to 94 °C) |
| Power use | 0.075 kWh heat-up + espresso without steam, 0.154 kWh with steam; keeping warm 0.045 / 0.084 kWh per hour |
| Noise | 56 dB |
| Water tank | 2,5 l |
| Drip tray | 1,2 l |
| Dimensions (W × H × D) | 38 × 38 × 36 cm |
| Weight | 15 kg |
| Portafilter / tamper | 58 mm / 58,55 mm |
We didn’t buy this machine ourselves because it wasn’t yet available before the market launch. We are donating the purchase price to a social organisation in Brazil. We arranged early delivery of the Elizabeth 3 with Lelit at their stand at the trade fair in Brussels.


